你的購物車是空的
{{ 'product.bundled_products.label' | translate }}
{{ 'product.bundle_group_products.label' | translate }}
{{ 'product.buyandget.label' | translate }}
{{ 'product.gift.label' | translate }}
{{ 'product.addon_products.label' | translate }}
{{item.product.title_translations|translateModel}}
{{ field.name_translations | translateModel }}
-
{{ childProduct.title_translations | translateModel }}
{{ getChildVariationShorthand(childProduct.child_variation) }}
-
{{ getSelectedItemDetail(selectedChildProduct, item).childProductName }} x {{ selectedChildProduct.quantity || 1 }}
{{ getSelectedItemDetail(selectedChildProduct, item).childVariationName }}
{{item.variation.name}}
{{item.quantity}}x
HK$0
{{ item.unit_point }} 點
{{ 'product.addon_products.label' | translate }}
{{addonItem.product.title_translations|translateModel}}
{{addonItem.quantity}}x
{{ mainConfig.merchantData.base_currency.alternate_symbol + "0" }}


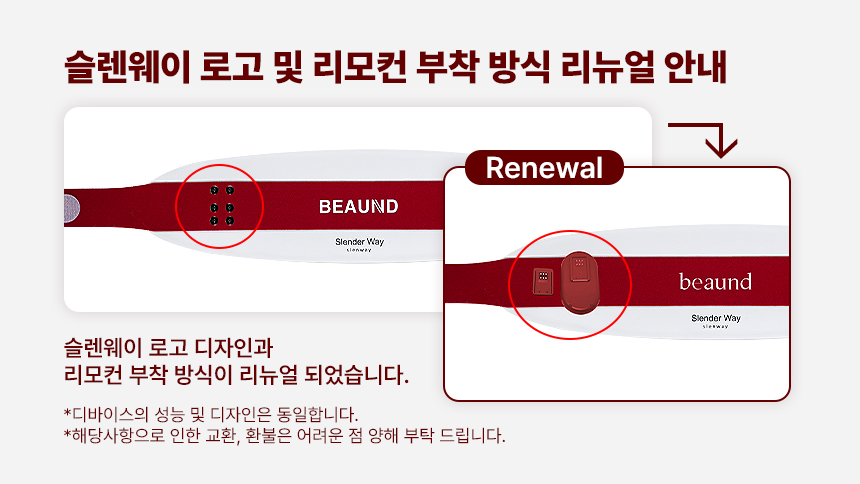


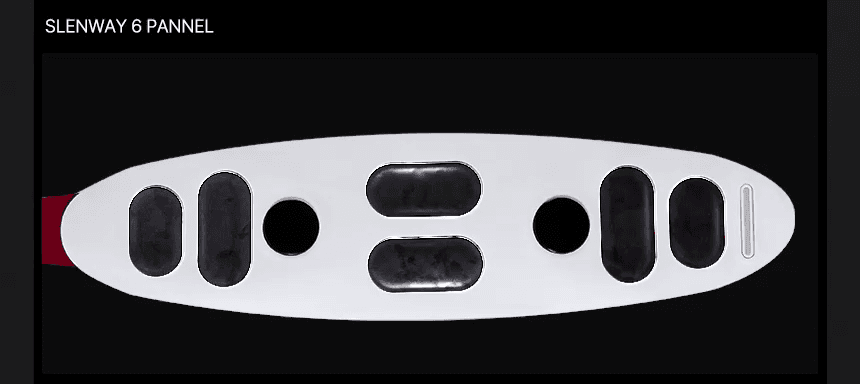

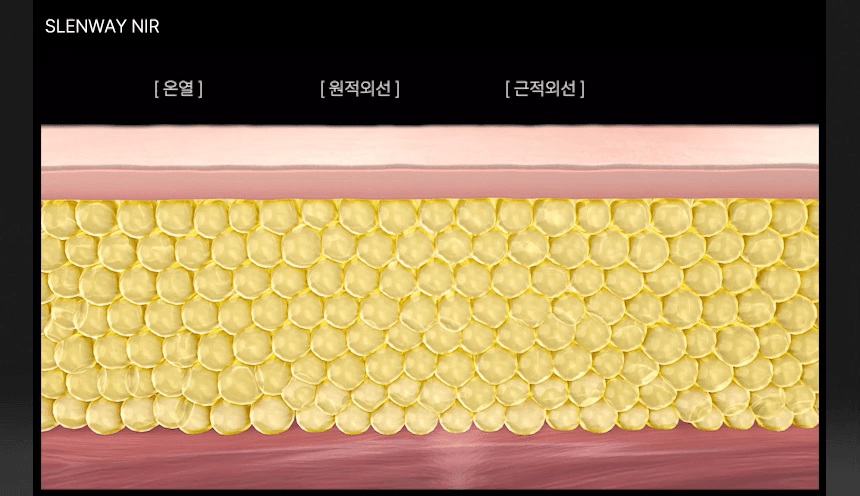


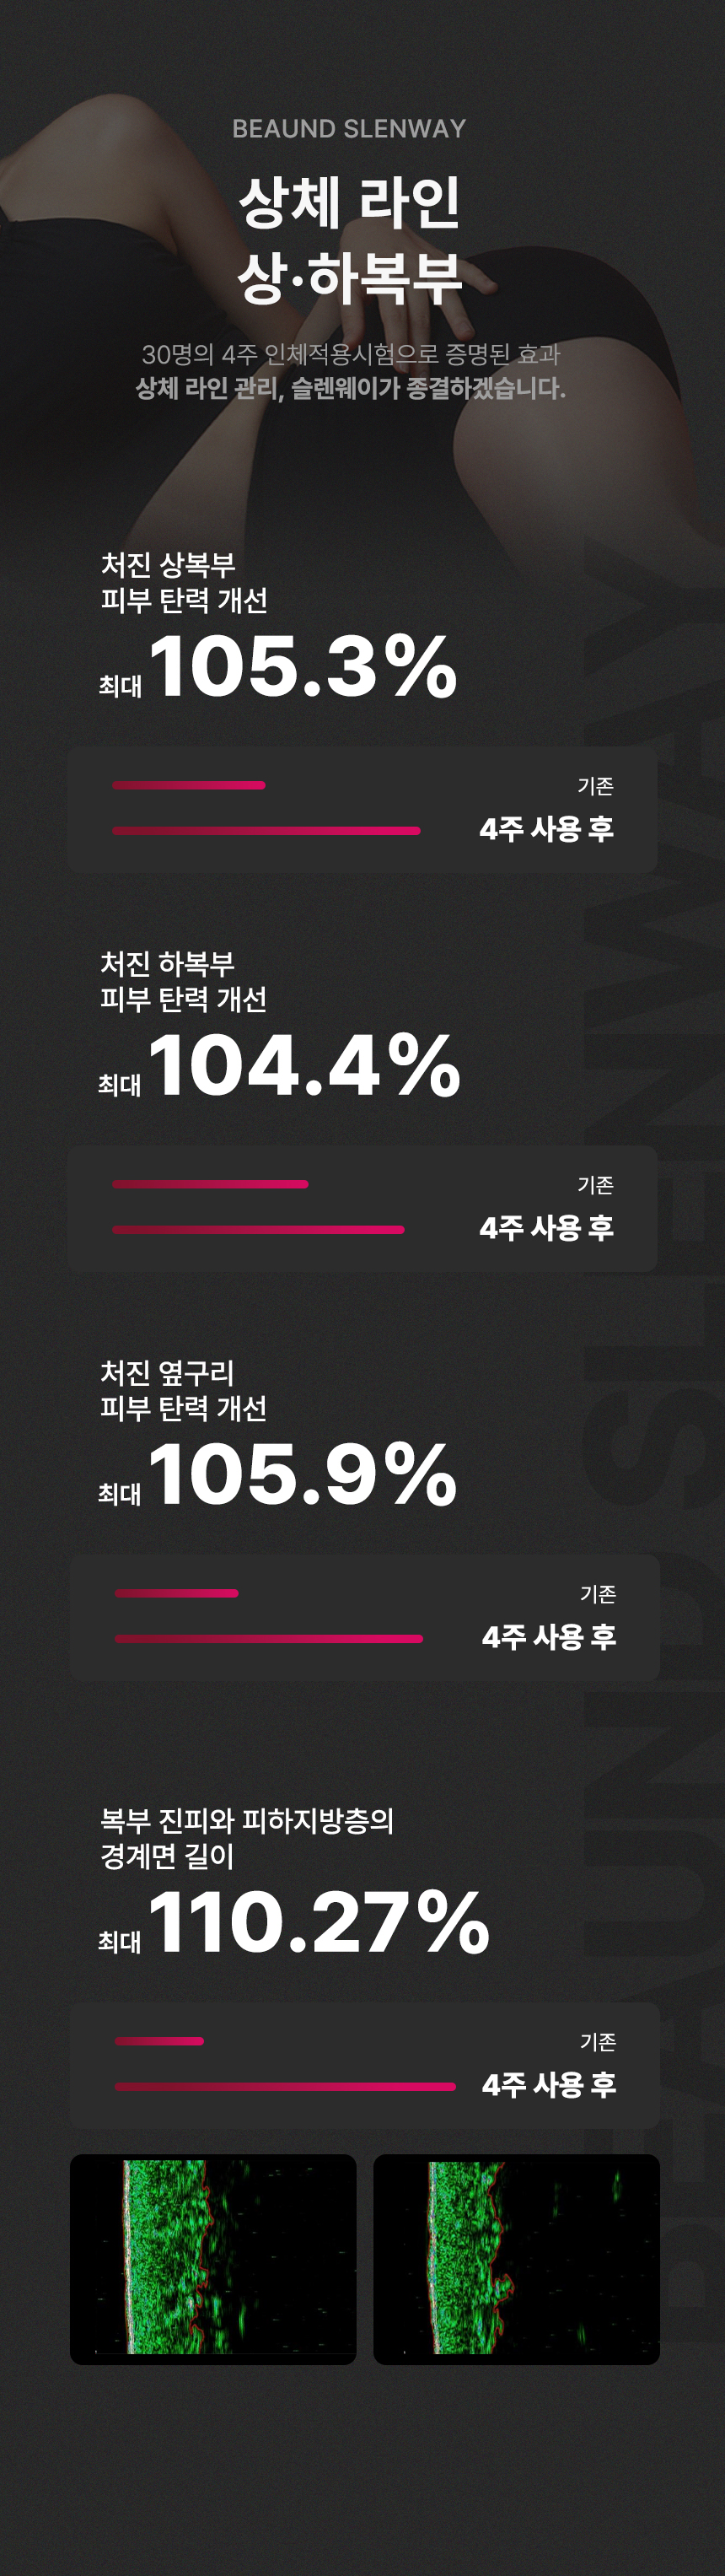


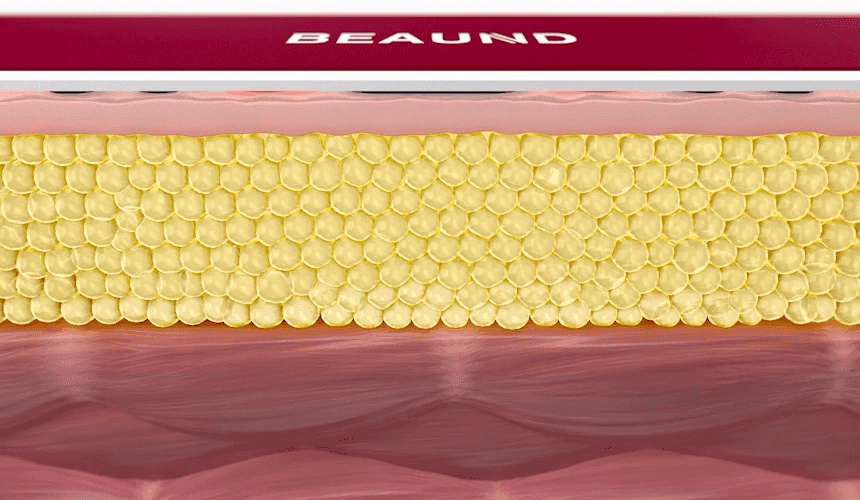


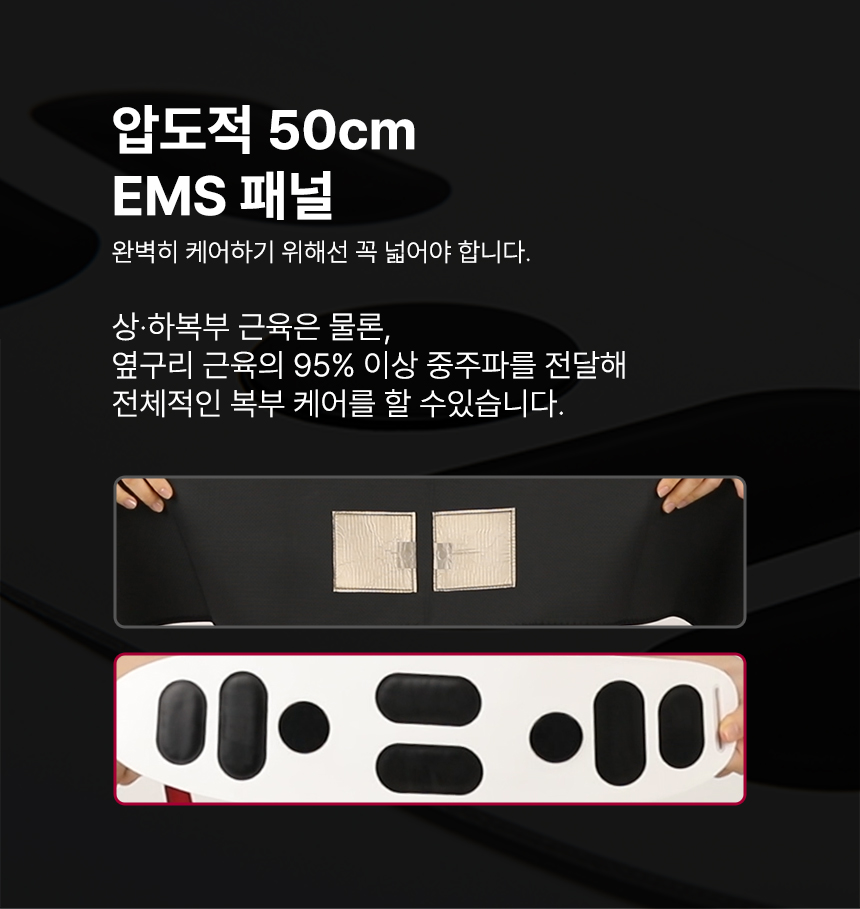


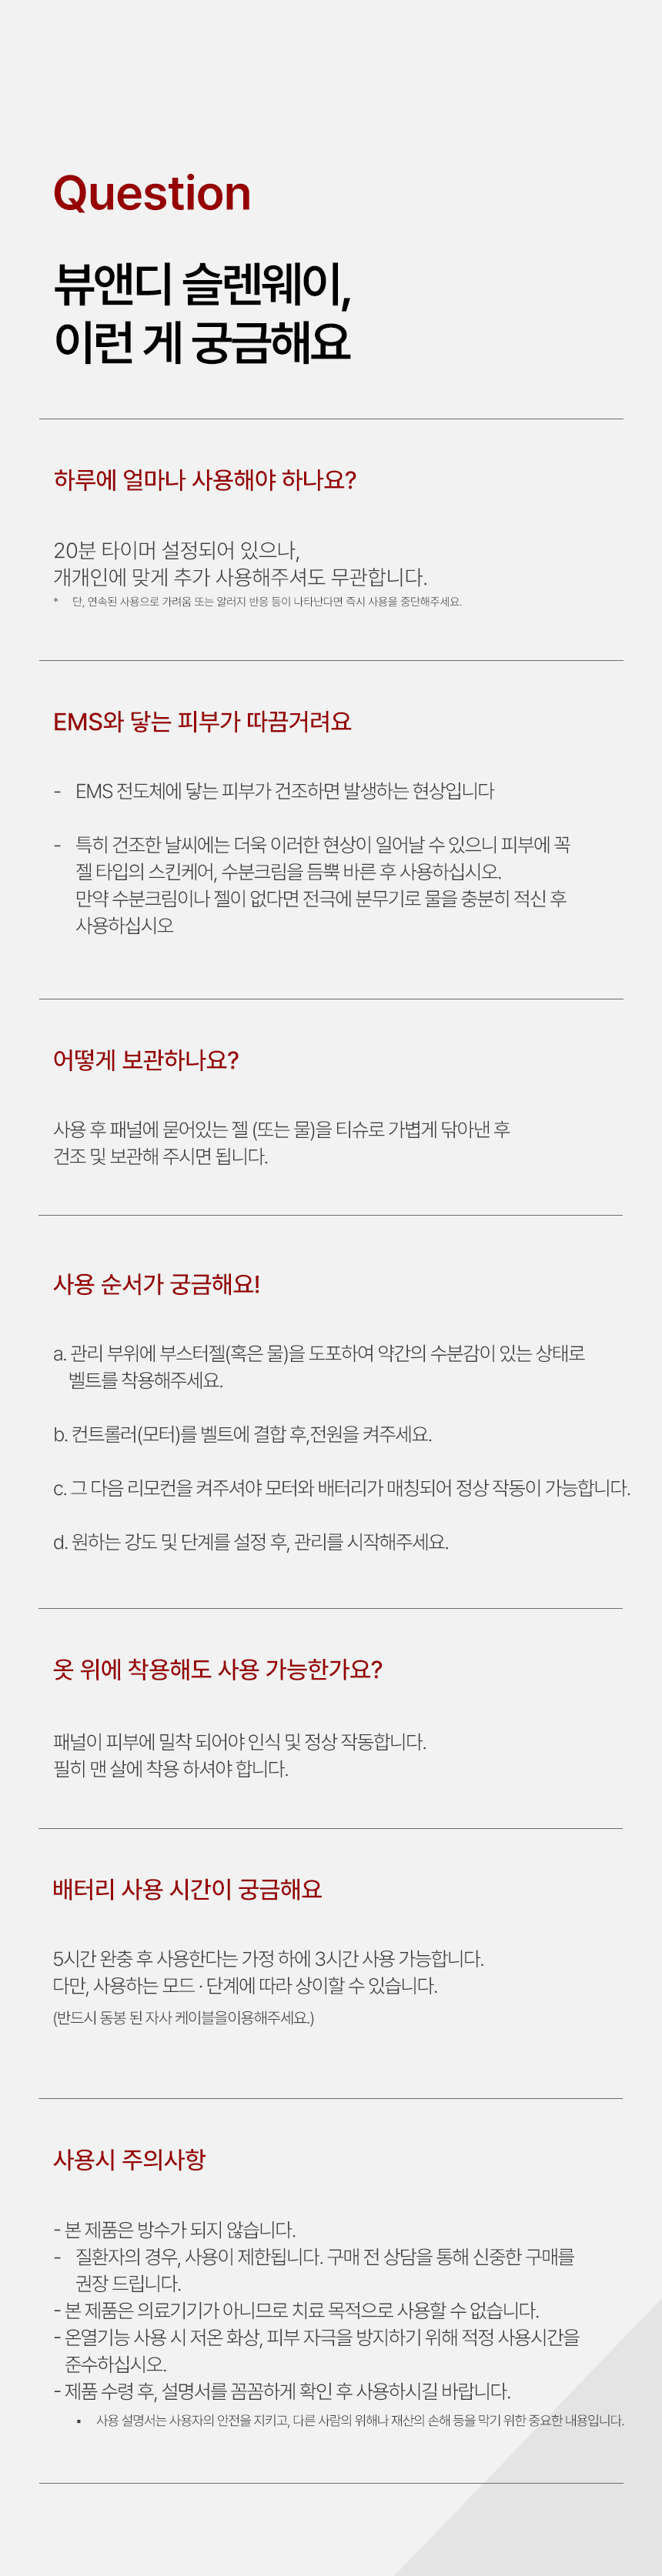

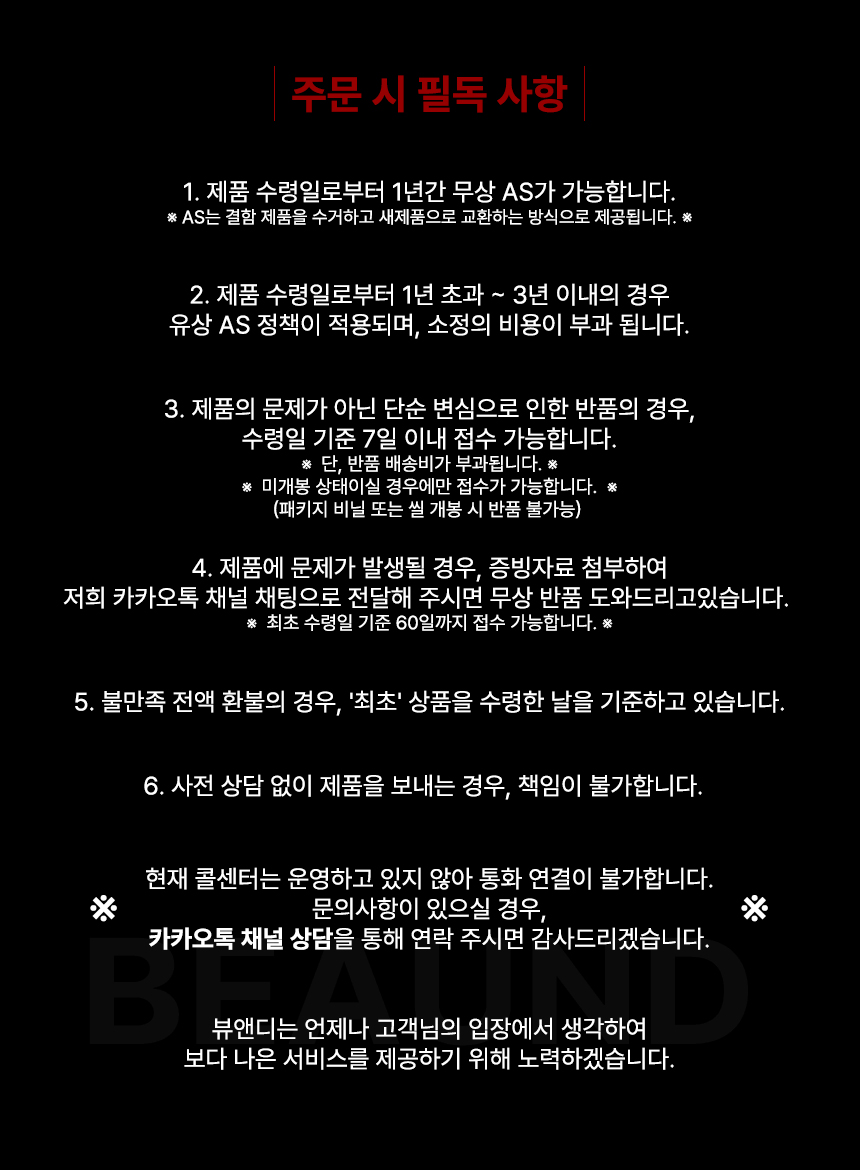
![[Slenway] Product Information Notice_Company.jpg](https://beaund.com/web/upload/NNEditor/20260113/5BEC8AACEBA08CEC9BA8EC9DB45DEC8381ED9288ECA095EBB3B4EAB3A0EC8B9C20EAB3B5ECA095EC9C84.jpg)


